Touch up paint around dents is the process of restoring color and protecting exposed metal after a dent causes paint damage. Done correctly, it stops rust from forming and keeps your car looking presentable without a full body shop visit. The key is understanding that paint touch-up fixes the color layer. It does not fix the metal underneath. This guide walks you through preparation, color matching, application, and finishing so you get the best result possible from a DIY repair.
What preparation steps are essential before applying touch-up paint around dents?
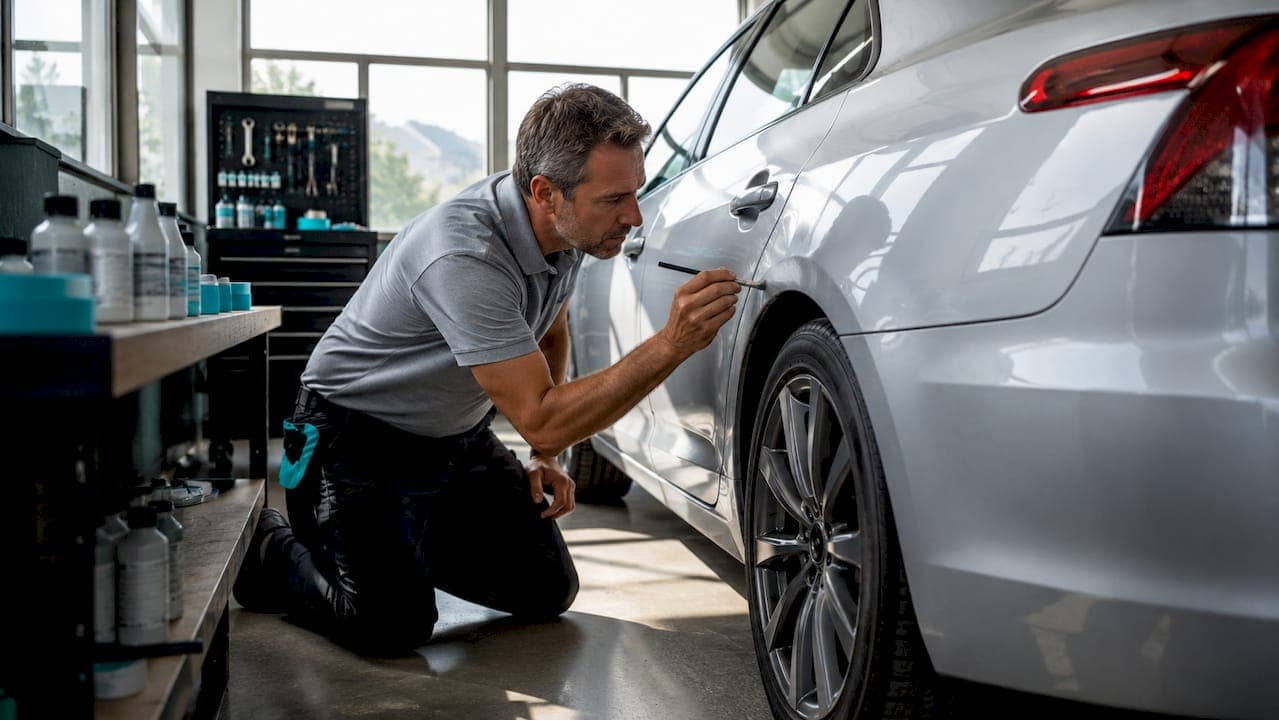
Preparation is the single biggest factor in whether your repair looks good or looks worse than the original damage. Skipping it causes paint to peel, bubble, or show visible edges within weeks.
Start by washing the damaged area with car soap and water. Follow that with a wipe-down using isopropyl alcohol to remove any wax, oil, or residue. Paint will not bond to a contaminated surface, no matter how carefully you apply it.

Next, assess the actual damage honestly. Touch-up paint works only on chips or scratches smaller than a coin. If the metal is bent, creased, or pushed inward, paint alone will not fix the problem. You need to address the metal deformation first, or the paint will crack and peel as the panel flexes.
Gather your tools before you open any paint:
- OEM matched touch-up paint (pen, bottle, or spray)
- Fine-tipped brush or toothpick for small chips
- 2000-grit and 3000-grit wet sandpaper
- Automotive clear coat
- Polishing compound
- Painter's tape and masking paper
- Isopropyl alcohol and clean microfiber cloths
Mask off the area around the damage with painter's tape. This keeps overspray off good paint and gives you a clean boundary to work within.
Pro Tip: Apply masking tape at least two inches beyond the damaged area. Overspray travels farther than you expect, especially with spray-based touch-up products.
How do you select the right touch-up paint for the best color match?
Color matching is where most DIY repairs fail. A slightly wrong shade is more noticeable than the original chip, especially in direct sunlight.
Your vehicle's OEM paint code is the only reliable starting point. OEM paint codes, typically 3–6 alphanumeric characters, ensure the best color accuracy compared to any generic or approximate match. Find your code in one of these locations:
- Driver's door jamb (most common location)
- Under the hood on a sticker near the firewall
- Inside the glove box or trunk lid
- Your vehicle's owner's manual or VIN decoder
Once you have the code, buy from a supplier that formulates to that exact specification. Generic paints sold by color name alone, like "silver" or "dark blue," rarely match factory finishes. The difference becomes obvious once the paint dries.
| Paint source | Color accuracy | Best for |
|---|---|---|
| OEM code matched kit | High | All vehicles, especially newer models |
| Generic color-name paint | Low | Not recommended for visible panels |
| Dealer-sourced touch-up pen | High | Small chips, single-panel repairs |
| Specialty automotive retailer | High | Aged or discontinued paint codes |
Using a spray-out card to test your paint formula before applying it to the car is one of the most underused techniques in DIY repair. Spray the card, let it dry fully, and hold it against your panel in different lighting conditions, including direct sun and shade. Faded factory paint often reads differently than a fresh formula, and the card test reveals that before you commit to the car.
What is the step-by-step process for applying touch-up paint around dents?
The application process determines whether your repair blends or stands out. Rushing any step produces visible edges, uneven texture, or paint that peels within months.
Degrease and final prep
Wipe the repair area one final time with isopropyl alcohol right before you open the paint. Even fingerprints from handling the masking tape can cause adhesion problems. Let the alcohol evaporate completely, which takes about 60 seconds.
Apply the base coat in thin layers
Building depth with 3–5 thin layers, each spaced 20–30 minutes apart, prevents the uneven texture that comes from applying one thick coat. Use a fine brush or toothpick for chips smaller than a pencil eraser. For larger areas, a touch-up pen or spray works better. Apply each coat just to the damaged area. Do not spread it onto surrounding paint.
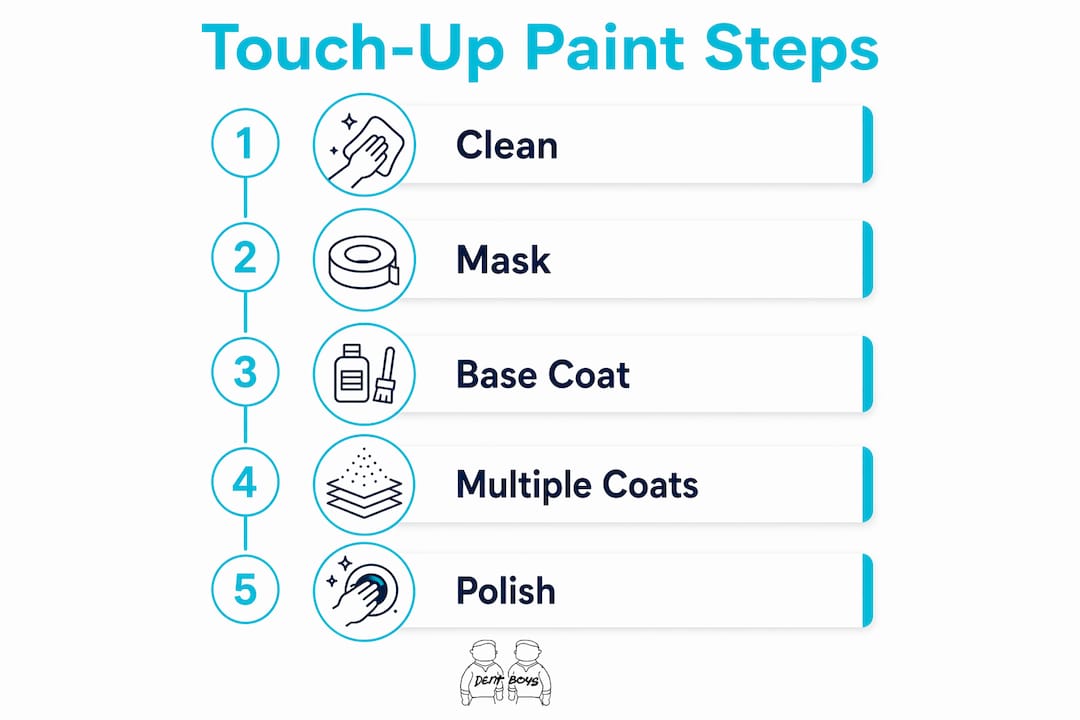
The numbered sequence below covers the full repair from start to finish:
- Degrease the surface with isopropyl alcohol and let it dry.
- Apply the first thin coat of base color. Let it dry 20–30 minutes.
- Apply a second thin coat. Repeat until the chip is level with surrounding paint (typically 3–5 coats).
- Let the final base coat cure for at least one hour before applying clear coat.
- Apply two thin coats of clear coat, drying 20–30 minutes between each.
- Wait 24 hours before sanding.
- Wet sand lightly with 2000-grit sandpaper to level any raised edges.
- Follow with 3000-grit sandpaper for a smoother surface.
- Apply polishing compound with a microfiber cloth to blend the repair into surrounding paint.
Pro Tip: If the repaired area sits slightly higher than the surrounding paint after drying, do not sand it immediately. Let it cure for a full 24 hours first. Fresh paint is soft and sanding too early creates scratches that show through the clear coat.
Seal and finish
Polishing compound after sanding blends the repair edges and removes the dull haze left by sandpaper. Work in small circular motions with a clean microfiber cloth. Wipe off the residue and inspect the repair in natural light. A second pass with compound is normal on deeper repairs.
The most common mistakes in this stage are applying too much compound at once, which creates swirl marks, and skipping the final wipe-down, which leaves a cloudy film.
When is touch-up paint not enough for dent repairs?
Touch-up paint has real limits. Knowing those limits before you start saves you from making the damage worse.
Touch-up products are not suitable for scratches longer than a finger or for areas with rust, bent metal, or large chips. If your dent has any of the following conditions, paint alone will not produce a good result:
- The metal is visibly bent, creased, or pushed inward
- The paint is peeling or lifting around the edges of the dent
- Rust has already started forming in the exposed area
- The damaged area is larger than a quarter
Painting over dented metal without correcting the deformation risks paint cracking as the panel flexes and accelerates corrosion underneath. The paint seals moisture against bare metal, which speeds up rust rather than stopping it.
Paintless Dent Repair, commonly called PDR, is the right first step when the metal is deformed but the surrounding paint is still intact. PDR manipulates the metal from behind the panel without sanding or repainting, preserving the factory finish. Once the metal is back in shape, a paint touch-up on any remaining chips becomes far more effective and longer lasting.
The right order is always metal first, paint second. Applying color to a dent that still has bent metal underneath is a short-term fix that creates a longer-term problem.
Key takeaways
Successful touch-up paint repair around dents requires OEM color matching, proper surface prep, and 3–5 thin coats with full drying time between each layer before sealing and polishing.
| Point | Details |
|---|---|
| Prep is non-negotiable | Clean with car soap and isopropyl alcohol before applying any paint. |
| Use your OEM paint code | A 3–6 character code from the door jamb gives the most accurate color match. |
| Apply thin coats only | Three to five thin layers with 20–30 minutes of drying between each prevents peeling. |
| Test before you commit | Use a spray-out card to verify color accuracy in multiple lighting conditions. |
| Know when to stop | Bent metal, rust, or large chips require professional dent repair before any paint work. |
Why I always check the metal before reaching for the paint
Most car owners grab a touch-up pen the moment they see a chip near a dent. I understand the instinct. The paint damage is visible. The dent feels like a separate problem. But in practice, they are the same problem, and treating them separately almost always produces a worse result.
The repairs I have seen go wrong share one pattern: paint applied over metal that was never corrected. The finish looks acceptable for a few weeks, then the paint starts cracking along the edge of the dent as the panel flexes. By that point, moisture has already gotten under the paint, and rust is forming faster than it would have if the chip had been left alone.
Touch-up paint will not look invisible on faded panels without restoring the surrounding paint first. That is not a failure of the product. It is physics. A fresh formula applied to sun-faded paint will always read slightly different in direct light. Managing that expectation matters more than any technique tip.
My honest advice: if the dent is small and the paint is intact, PDR is the right call first. If there is a chip but no metal deformation, touch-up paint done carefully with an OEM matched kit produces a genuinely good result. The two repairs serve different problems. Knowing which one you actually have saves time, money, and frustration.
— Martin
When Dent-boys makes the repair easier
Touch-up paint works best when the metal underneath is already straight. Dent-boys specializes in paintless dent repair that restores the panel shape without sanding or repainting, which gives any follow-up paint touch-up a clean, stable surface to bond to. Dent-boys offers free estimates, pick-up and delivery, a $0 deductible, and a lifetime warranty on every repair. If your dent has bent metal or the paint is lifting, getting the metal corrected first is the step that makes everything else work.
FAQ
Can you apply touch-up paint directly over a dent?
Touch-up paint applied over a dent without correcting the metal first will crack and peel as the panel flexes. Always repair the metal deformation before applying any paint.
How do I find my car's OEM paint code?
Check the driver's door jamb sticker first. The code is typically a 3–6 character alphanumeric string labeled "paint," "color," or "ext."
How many coats of touch-up paint do I need?
Apply 3–5 thin coats, letting each dry for 20–30 minutes before adding the next. One thick coat causes uneven texture and adhesion failure.
Does touch-up paint stop rust?
Touch-up paint seals exposed metal and slows rust when applied correctly over clean, bare metal. It does not reverse rust that has already started forming.
When should I use paintless dent repair instead of touch-up paint?
Use PDR when the metal is dented but the surrounding paint is still intact. Use touch-up paint for chips and scratches where the metal is flat and undamaged.