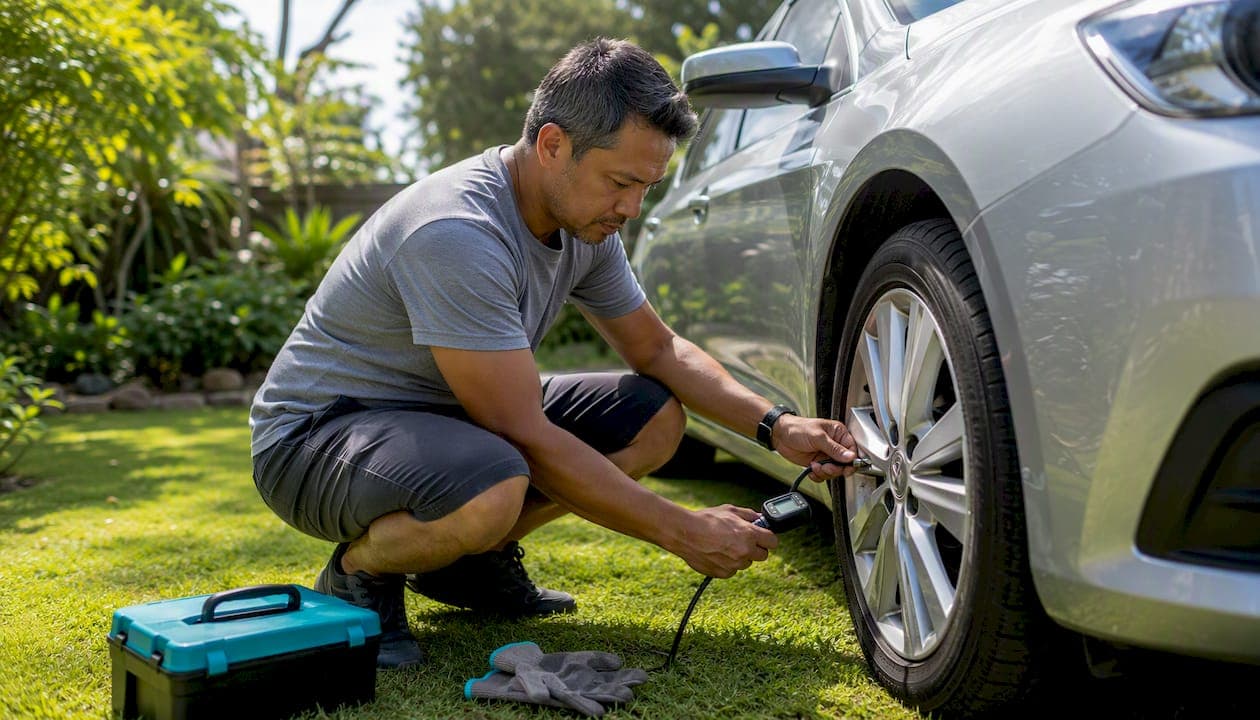
The easiest, highest-impact hassle-free car maintenance examples are monthly tire pressure checks (2 minutes), a quick oil level inspection (3 minutes), wiper blade swaps (5–10 minutes), washer fluid top-offs (2 minutes), cabin and engine air filter replacements (a brief time), light bulb checks (5 minutes), and battery terminal cleaning (10 minutes). AAA and Consumer Reports both point to these same tasks as the foundation of any reliable maintenance routine. None of them require a lift, a shop, or a mechanic.
Here is the short version of what each task does for you:
- Check tire pressure (2 min): Prevents uneven wear, improves fuel economy, and reduces blowout risk.
- Check oil level (3 min): Catches low oil before it damages the engine.
- Replace wiper blades (5–10 min): Restores clear visibility in rain or snow.
- Top off washer fluid (2 min): Keeps the windshield clean without stopping at a shop.
- Replace cabin/engine air filter (10–15 min): Improves air quality inside the car and engine breathing.
- Inspect exterior lights (5 min): Avoids a ticket and keeps you visible at night.
- Clean battery terminals (10 min): Prevents no-start situations caused by corrosion buildup.
According to USA TODAY, the average U.S. car is approaching 13 years old, which makes these small habits more valuable than ever. A 13-year-old car with consistent oil changes and proper tire pressure will outlast a newer one that gets ignored.
Table of Contents
- Hassle-free car maintenance examples you can do this weekend
- How to do the three most useful DIY tasks, step by step
- A simple maintenance schedule you can actually follow
- What tools make routine car care genuinely painless
- When simple maintenance is not enough: signs to call a pro
- "Listen to your car" — signs that mean more than a quick fix
- Key Takeaways
- Why the "just do the basics" advice misses half the picture
- Dent-boys handles the damage that maintenance can't fix
- Useful sources and further reading
Hassle-free car maintenance examples you can do this weekend
These are not vague suggestions. Each one is a specific task with a clear payoff, a realistic time estimate, and a signal that tells you when to stop and call someone.
Check engine oil level Open the hood, pull the dipstick, wipe it clean, reinsert it fully, and pull it again. The oil should sit between the two marks and look amber to dark brown. Black and gritty means it is overdue for a change. Do this monthly or every 1,000 miles. Takes 3 minutes. If the level drops noticeably between checks, that is a red flag worth investigating.

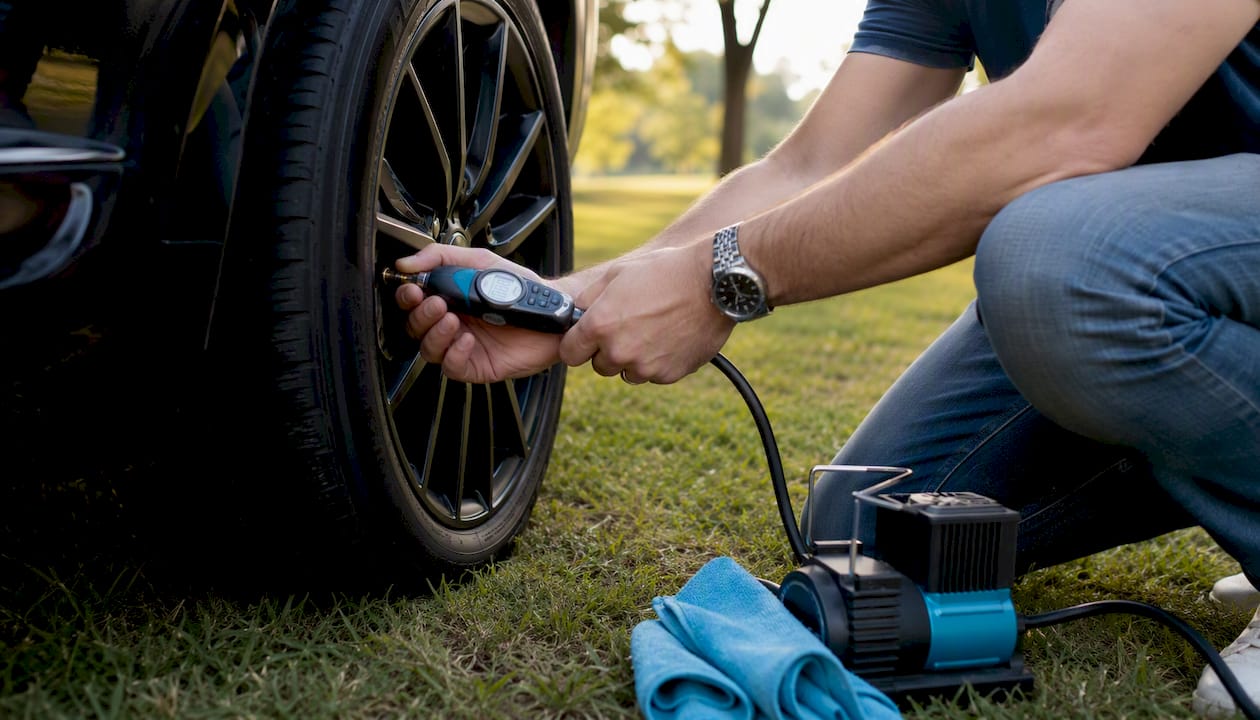
Check tire pressure Every tire loses roughly 1 PSI per month naturally, and cold weather accelerates that. A $10 digital gauge and 2 minutes once a month is all it takes. Always check before you drive, not after. The correct pressure is on the doorjamb sticker, not the tire sidewall. More on the exact steps in the next section.
Replace wiper blades Most blades last 6–12 months. If they streak, skip, or chatter, swap them out. The replacement blade packaging includes a fitment guide for your make and model. Most blades click on in under 5 minutes per side. According to Quartz, wiper blades cost $20–$40 at a parts store versus $60–$100 at a dealership service counter.
Top off washer fluid Pop the hood, find the blue-capped reservoir, and pour in the correct fluid. Do not use plain water in winter climates — it freezes. This takes 2 minutes and costs under $5 per gallon of fluid.
Replace cabin and engine air filters A cabin filter sits behind the glove box on most vehicles and slides out without tools. An engine air filter lives in a plastic housing under the hood, usually secured by clips or a single bolt. Retail filters run $15–$25 versus $60–$90 at a dealership. Replace both once a year or every 15,000–20,000 miles, whichever comes first.
Inspect exterior lights Walk around the car and check headlights, taillights, brake lights, and turn signals. A friend tapping the pedals while you watch the back makes this faster. Replacement bulbs for most vehicles cost $5–$15 and require only a screwdriver.
Clean battery terminals White or blue-green crust on the battery posts is corrosion. Left alone, it causes slow cranking and eventually a no-start. A battery terminal brush (about $5) and a paste of baking soda and water dissolves the buildup in minutes. Disconnect the negative cable first, then the positive. Reconnect in reverse order.
Rotate tires Tire rotation every 5,000–7,500 miles evens out wear and extends tire life significantly. This one is worth having a shop handle unless you own a floor jack and jack stands. Most quick-lube shops bundle it with an oil change for little or no extra cost.
Pro Tip: Keep a small kit in your trunk: a digital tire gauge, a small funnel, a pair of nitrile gloves, a few shop rags, and a spare wiper blade insert. That kit turns a 20-minute errand into a 5-minute fix.
Your owner's manual is the definitive schedule reference for your specific vehicle. Consumer Reports recommends treating it as the first stop before any maintenance decision, since intervals vary by engine type, driving conditions, and model year.
How to do the three most useful DIY tasks, step by step
These three tasks cover the highest-payoff ground for a beginner. Each takes under 15 minutes and requires tools most people already own.
A. Check and top off engine oil
Time: 3–5 minutes Tools: Paper towels or a clean rag, the correct oil grade (listed on the oil cap or in the owner's manual)
- Park on level ground and let the engine cool for at least 5 minutes.
- Open the hood and locate the dipstick (usually a brightly colored loop or handle).
- Pull the dipstick out, wipe it clean with a rag, and reinsert it all the way.
- Pull it out again and read the level. It should fall between the MIN and MAX marks.
- If it is low, add oil in small amounts using a funnel, checking the dipstick after each addition. Do not overfill.
- Replace the dipstick and close the hood.
Safety tip: Never add oil to a hot engine. If the oil looks milky or foamy, stop and call a mechanic — that can indicate a coolant leak into the engine.
The Federal Trade Commission confirms that performing your own oil top-offs and changes does not void your factory warranty, provided you use the manufacturer-specified oil grade and keep your receipts.
B. Check and inflate tires
Time: 5–10 minutes Tools: Digital tire pressure gauge, access to an air source (gas station pump or a 12V inflator)
- Check tires before driving. Cold inflation pressure gives an accurate reading because heat from driving expands the air and masks under-inflation.
- Find the correct pressure on the sticker inside the driver's doorjamb. Ignore the number on the tire sidewall — that is the maximum, not the operating pressure.
- Remove the valve cap from the first tire and press the gauge firmly onto the valve stem.
- Read the pressure. If it is low, add air in short bursts and recheck.
- If it is over the target, press the small pin inside the valve stem to release air.
- Replace the valve cap and repeat for all four tires, including the spare if accessible.
Safety tip: A tire that repeatedly loses pressure faster than the others may have a slow leak. Get it inspected before it fails on the highway.
Pro Tip: The doorjamb sticker is the number to trust. Many drivers inflate to the sidewall maximum by mistake, which causes a harsh ride and accelerates center-tread wear.
C. Replace windshield wiper blades
Time: 5–10 minutes Tools: None required for most vehicles; occasionally a flathead screwdriver
- Lift the wiper arm away from the windshield until it locks in the upright position.
- Find the release tab where the blade meets the arm — usually a small plastic clip or button.
- Press the tab and slide the blade downward off the hook.
- Align the new blade with the hook, slide it upward until it clicks.
- Lower the arm gently back onto the glass.
- Repeat on the other side.
Safety tip: Never let a wiper arm snap back onto a bare windshield without a blade attached. The metal arm can crack the glass.
Family Handyman notes that checking the owner's manual for the correct blade size before buying prevents the frustrating experience of getting home with the wrong part.
A simple maintenance schedule you can actually follow
The table below separates tasks by frequency so you can build a routine without memorizing a long list.
| Frequency | Task | Interval / Notes |
|---|---|---|
| Monthly | Tire pressure check | Before driving; adjust to doorjamb spec |
| Monthly | Oil level check | Top off if below MIN mark |
| Monthly | Washer fluid level | Refill with correct seasonal fluid |
| Monthly | Exterior lights inspection | Walk-around; replace any burned-out bulb |
| Every 5,000–7,500 miles | Oil change | Follow owner's manual; shorter for severe use |
| Every 5,000–7,500 miles | Tire rotation | Can be bundled with oil change |
| Every 15,000–20,000 miles | Cabin air filter | Replace sooner if dusty or smoky conditions |
| Every 15,000–30,000 miles | Engine air filter | Check owner's manual for exact interval |
| 30,000 miles | Brake fluid, spark plugs, belts check | Varies by make; consult owner's manual |
| 60,000 miles | Coolant flush, transmission service | Model-specific; owner's manual is definitive |
| 90,000 miles | Timing belt (if applicable), major inspection | Some engines use a chain — check your manual |
Monthly quick checks take about 10 minutes total, and typical oil-change intervals run 5,000–10,000 miles depending on whether you use conventional or synthetic oil. The owner's manual narrows that range for your specific engine.
A few conditions shorten every interval on this table: frequent short trips under 5 miles, towing or hauling heavy loads, extreme heat or cold, and stop-and-go city driving. AAA classifies these as "severe" driving conditions, and Consumer Reports recommends cutting standard intervals roughly in half when they apply.
Pro Tip: Set a recurring monthly phone reminder titled "Car 10-minute check." Pair it with a task you already do — the first of the month, a fill-up, or a Sunday morning — and it stops feeling like a chore.
The 30/60/90 rule is a useful shorthand. At 30,000 miles, focus on filters, fluid condition, and belts. At 60,000, add coolant and transmission fluid. At 90,000, inspect the timing belt (if your engine has one), suspension components, and spark plugs. These are checkpoints, not rigid deadlines — your owner's manual and driving conditions set the actual schedule.
What tools make routine car care genuinely painless
You do not need a full garage setup. A compact kit covering the tasks above costs well under $100 total and fits in a small bag in your trunk.
- Digital tire pressure gauge (~$10): More accurate and easier to read than the old pencil-style gauges. A non-negotiable for monthly checks.
- 12V portable inflator (~$25–$40): Plugs into the 12V outlet in your car. Eliminates the need to drive to a gas station with a low tire.
- Funnel (~$3): Prevents oil spills when topping off. Get one with a long neck for tight engine bays.
- Nitrile gloves (~$8 for a box): Keep your hands clean and protect against battery acid and brake fluid.
- Shop rags or microfiber cloths (~$5): For wiping dipsticks, cleaning terminals, and general cleanup.
- Battery terminal brush (~$5): The small wire brush designed for battery posts. Removes corrosion in seconds.
- Basic socket set (~$20–$30): A 3/8-inch drive set with common metric and SAE sizes handles most filter housings and light covers.
- Spare wiper blade insert (~$10–$15): Keep one in the trunk for the inevitable moment a blade tears in a rainstorm.
Pro Tip: Print a one-page monthly checklist and laminate it. Tape it inside your trunk lid or glove box so the routine is visible every time you open the car.
DIY tasks like filter swaps, wiper replacements, and tire-pressure checks consistently save owners the most money relative to effort. A digital gauge and a $25 filter represent maybe $35 in spending to avoid a $90 shop visit.
For car owners who prefer a hands-off approach, maintenance subscription plans bundle oil changes, tire rotations, and automated reminders into a predictable monthly cost. They are a legitimate alternative for busy schedules.
When simple maintenance is not enough: signs to call a pro
Some problems look like maintenance items but are not. Attempting them without the right training or tools can make things worse or create a safety hazard.
Stop and call a mechanic for any of these:
- Dashboard warning lights (except the low washer fluid icon): Check engine, oil pressure, battery, ABS, and airbag lights all require a diagnostic scan. Driving on an oil pressure warning for even a few miles can destroy an engine.
- Grinding, squealing, or pulsing brakes: These indicate worn pads, warped rotors, or a caliper problem. Brakes are not a DIY repair for most car owners.
- Soft or spongy brake pedal: A pedal that sinks toward the floor suggests air in the brake lines or a failing master cylinder. Pull over and call for a tow.
- Persistent new noises or vibrations: A knock, rattle, or shimmy that was not there last week is the car telling you something changed. Ignoring it rarely ends well.
- Fluid puddles under the car: A small drip of water from the AC drain is normal. Oil, coolant (sweet smell), transmission fluid (reddish), or brake fluid (clear, near a wheel) are not.
- Overheating temperature gauge: Pull over immediately. Driving an overheating engine can warp the cylinder head, turning a $200 repair into a $2,000 one.
- Electrical faults or hybrid/EV high-voltage systems: These require specialized equipment and training. Never open an orange-cable housing on a hybrid or EV.
- Timing belt replacement: The procedure is complex and the consequences of getting it wrong — a snapped belt at speed — can total the engine.
The rule of thumb: If a warning light stays on after a restart, if a noise gets louder under load, or if a fluid level drops noticeably between weekly checks, treat it as a next-day appointment at minimum. A grinding brake or overheating gauge is a same-day tow.
Pro Tip: Keep a folder (physical or digital) with dated receipts for every service, including your own DIY work with the parts invoices. The FTC confirms that manufacturers cannot void your warranty for owner-performed maintenance when you use spec-compliant parts and have documentation.
"Listen to your car" — signs that mean more than a quick fix
AAA and Consumer Reports both frame this the same way: your car communicates through sounds, smells, and handling changes before a problem becomes serious. Learning to read those signals is the most underrated maintenance skill.
Sounds to take seriously:
- A knocking or ticking from the engine, especially on startup, often points to low oil pressure or worn bearings.
- A high-pitched squeal when turning can indicate a worn power steering belt or low power steering fluid.
- A rhythmic clunking over bumps usually means a worn strut, sway bar link, or CV joint.
Smells that need attention:
- Burning rubber or plastic after driving suggests a slipping belt or an electrical short.
- A sweet, syrupy smell near the front of the car after parking often means a coolant leak.
- Rotten eggs from the exhaust can point to a failing catalytic converter.
Handling changes:
- Pulling to one side under braking suggests uneven brake wear or a stuck caliper.
- A steering wheel that vibrates at highway speeds usually means a tire balance issue or a bent wheel.
- Sudden changes in how the car tracks straight on a flat road can indicate a tire losing pressure.
Immediate actions by symptom:
- New engine noise: Check oil level immediately. If oil is full, schedule a shop visit within 48 hours.
- Sweet smell or steam from the hood: Check coolant level when the engine is cold. Do not open the radiator cap on a hot engine.
- Pulling under braking: Check tire pressure on both front tires. If equal, book a brake inspection.
- Vibration at speed: Check for a visibly damaged or bulging tire. If none, schedule a wheel balance.
- Repeated low fluid levels: A fluid that keeps dropping has a leak. Find the source before refilling becomes a habit.
Pro Tip: If a noise or symptom is hard to describe, record a short video or audio clip on your phone while driving. Mechanics diagnose faster when they can hear the actual sound rather than a verbal description.
AAA emphasizes that investigating unusual noises or warning lights promptly is the single most effective way to prevent minor issues from becoming major repairs. The car is giving you a window. Most owners who act within that window pay a fraction of what those who wait eventually spend.
Key Takeaways
Consistent low-effort maintenance — monthly checks, timely oil changes, and quick part swaps — prevents the majority of roadside breakdowns and costly repairs for any car owner.
| Point | Details |
|---|---|
| Monthly checks take 10 minutes | Tire pressure, oil level, washer fluid, and lights cover the highest-risk failure points. |
| Oil and tire rotation intervals | Change oil every 5,000–7,500 miles; rotate tires every 5,000–7,500 miles per your owner's manual. |
| DIY saves real money | Cabin filters cost $15–$25 DIY versus $60–$90 at a dealer; wiper blades run $20–$40 versus $60–$100. |
| Know when to stop | Brake grinding, warning lights, overheating, and fluid puddles require a professional, not a YouTube video. |
| Dent-boys for dent and hail damage | When routine checks reveal dents or hail damage, Dent-boys offers free estimates, pickup/delivery, and a lifetime warranty on repairs. |
Why the "just do the basics" advice misses half the picture
Most car-care content stops at the checklist. Do the oil change, check the tires, replace the wipers. That advice is correct, but it treats maintenance as a static list rather than a feedback loop.
The car owners who get the most out of simple maintenance are the ones who pay attention to what changes between checks. Not just "is the oil low" but "is it lower than last month?" Not just "does the car pull" but "did it start pulling after that pothole?" The checklist is the floor, not the ceiling.
There is also a financial argument that rarely gets made clearly. Skipping a $30 oil change to save time is not a neutral decision. It is a bet that the engine will tolerate neglect, and engines are not forgiving about that bet. The math is straightforward: a few hundred dollars a year in basic maintenance versus a multi-thousand-dollar repair or a car that loses resale value faster than it should.
One more thing worth saying: dents and hail damage discovered during a routine walk-around are not cosmetic afterthoughts. Paint damage left unaddressed leads to rust, and rust is a structural problem, not just an appearance one. Acting on a dent the week you find it costs a fraction of what it costs six months later.
Dent-boys handles the damage that maintenance can't fix
Routine maintenance keeps your car running, but it does not fix the dent a shopping cart left on your door or the hail damage from last spring's storm. That is where Dent-boys comes in. Dent-boys specializes in paintless dent repair — no painting, no fillers, no long shop wait. The process restores your car to like-new condition without touching the factory finish.
The service is built around convenience: free estimates, pickup and delivery so you never drop off a car and arrange a ride, a rental vehicle during the repair, $0 deductible support through your insurance, and a lifetime warranty on every repair. If you spotted a dent during your last walk-around inspection, get a free estimate from Dent-boys and find out how fast it can be handled.
Useful sources and further reading
These are the sources behind the guidance in this article, each worth bookmarking for model-specific questions.
- Consumer Reports' Car Maintenance Checklist — Covers oil changes, coolant flushes, tire rotation, brake pads, and money-saving advice from mechanics. One of the most thorough free resources available.
- Consumer Reports: Car Care Basics for First-Time Owners — Beginner-focused guide to tire pressure, wiper replacement, and fluid checks. Good starting point if this article is your first exposure to DIY maintenance.
- AAA: Car Maintenance Schedule for Beginners — AAA's expert-backed guidance on warning signs, maintenance intervals, and when to escalate to a shop.
- AAA: 10 DIY Car Maintenance Tasks You Can Do at Home — Practical task list from AAA Auto Repair Centers, including oil checks, tire pressure, and battery care.
- Family Handyman: Car Maintenance Basics Everyone Should Know — Step-by-step how-tos for common DIY tasks with safety notes and owner's manual references.
- Federal Trade Commission: Warranty Guidance — The primary source on your rights as a DIYer. Manufacturers cannot void your warranty for owner-performed maintenance when you use spec-compliant parts and document the work.
- Quartz: DIY Car Maintenance Tasks to Save Money — Breaks down the cost savings on filters, wipers, and tire-pressure checks with retail versus dealer price comparisons.
Your owner's manual remains the single most authoritative reference for your specific vehicle. When in doubt about an interval, a fluid spec, or a procedure, the manual answers the question for your exact engine and trim level. A local independent mechanic is the right call for anything the manual flags as dealer-only or that requires specialized tools.