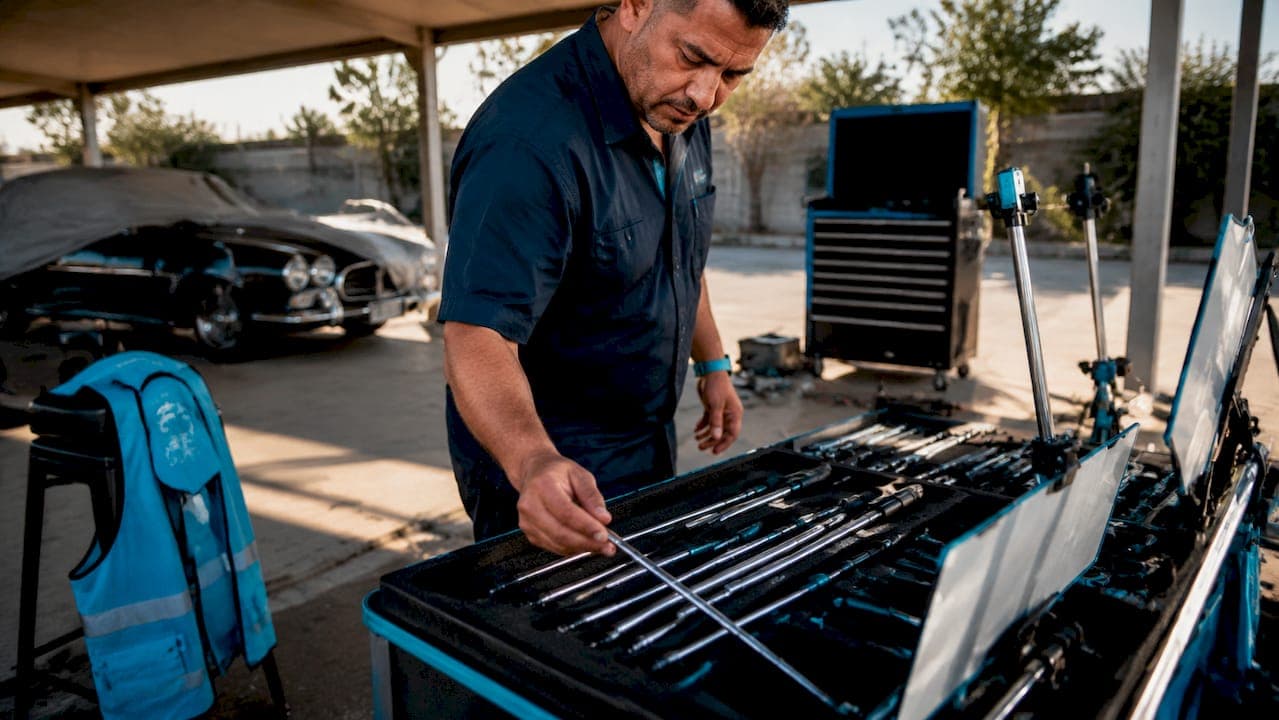
Professional PDR tools are specialized instruments designed to reshape automotive panels without breaking the factory paint finish, making them the foundation of every effective paintless dent repair workflow. This pdr tools professional overview covers the full equipment ecosystem: rod sets, glue pulling systems, LED reflection boards, tap-down tools, and the workflow logic that connects them. Organizations like the National Alliance of Paintless Dent Repair Technicians (NAPDRT) and PDR University set the standards that define how these tools get used in certified repair environments. Whether you are building your first professional kit or refining an advanced setup, the right tool selection determines repair speed, quality, and customer satisfaction.
What are the essential PDR tools and how do they work?
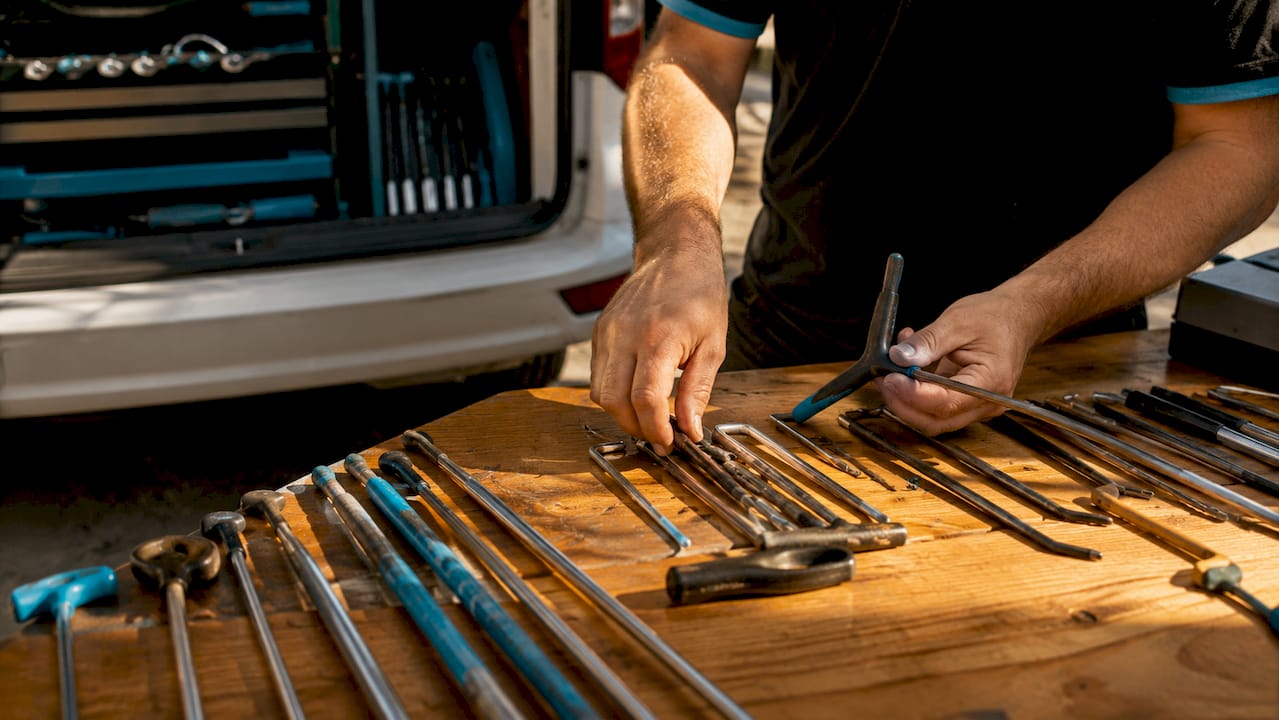
Professional-grade PDR tool sets include rods, whale tail tools, glue tabs, slide hammers, and knockdown and blending hammers, all built for daily production use with heat-treated stainless steel or spring steel handles. Each category serves a distinct function in the repair chain. Knowing which tool does what prevents wasted motion and protects the panel.
PDR rods and picks
PDR rods are the primary pushing instruments in any professional dent repair equipment setup. Rod types vary by repair area: long rods handle roof panels, whale tail rods work inside door beams, and hook rods reach quarter panels. Tip profiles also vary, from flat blunt tips for broad low spots to pointed tips for sharp creases. Matching the rod to the panel geometry reduces the risk of over-pushing.
Glue pulling systems
Glue pulling is the method of choice when rear panel access is impossible, such as on roofs, pillars, and aluminum panels. Adhesive tabs bond directly to the dent surface, and a slide hammer or mini-lifter pulls the metal back toward its original position. Mini-lifters allow more gradual force than slide hammers, which makes them the better choice for thin or delicate metal surfaces where over-pulling is a real risk. The tab size and adhesive temperature both affect how cleanly the metal moves.
LED reflection boards
LED reflection boards are the most critical diagnostic tool in the PDR process. They project parallel lines across the panel surface, letting technicians read the exact shape of a dent, including lows, highs, and shadow areas that are invisible under standard shop lighting. Without quality lighting, accurate assessment of dent shape or repair progress is not possible. Most professionals use a combination of fluorescent strip boards and portable LED panels to cover different panel angles.
Tap-down and blending tools
Knockdown and blending tools handle the finishing stage after pushing or pulling. They smooth high spots created by over-pushing and blend the repaired area with the surrounding metal. A blending hammer with a nylon or brass tip applies controlled downward force without scratching the paint. Skipping this stage leaves a repair that looks correct under LED boards but reads as uneven in natural light.
Pro Tip: Always check your tap-down pressure against the LED board after each strike. One tap too many creates a new high spot that takes longer to correct than the original dent.
| Tool Category | Primary Function | Material |
|---|---|---|
| PDR rods and picks | Push dents from behind the panel | Heat-treated stainless steel, spring steel |
| Glue pulling system | Pull dents where rear access is blocked | Plastic tabs, metal slide hammer or lifter |
| LED reflection boards | Visualize dent contours and repair progress | LED strips, fluorescent tubes |
| Tap-down tools | Smooth high spots after pushing or pulling | Nylon, brass, or steel tips |
| Trim removal tools | Disassemble panels without breaking clips | Plastic and metal pry tools |
How to build a professional PDR tool kit that matches your workflow
The most common mistake technicians make when assembling a kit is buying by piece count rather than by workflow stage. Assembling PDR kits based on repair workflow needs rather than maximizing tool count produces better results. Large kits often contain duplicates and low-value items that add weight and confusion without adding capability.
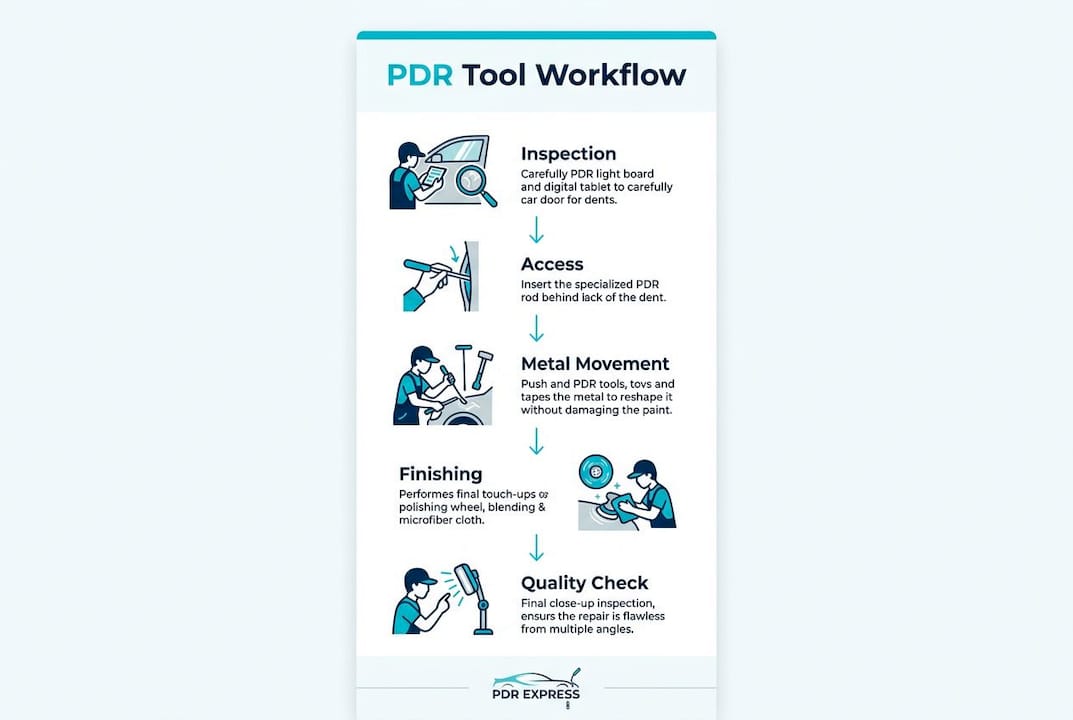
A workflow-aligned kit follows five stages: inspection, access, metal movement, glue pulling, and finishing. Build your kit around those stages in this order:
- Inspection tools. Start with a quality LED reflection board and a portable work light. You cannot repair what you cannot see clearly.
- Access tools. Add a dedicated trim removal set with plastic pry tools and clip pullers. Proper trim removal tools prevent damage to fragile plastic clips, which are expensive and time-consuming to replace.
- Metal movement tools. Select rods that cover your most common repair areas first: a door rod set, a long roof rod, and a whale tail for door beams. Add specialty rods as your work volume justifies them.
- Glue pulling tools. Include a slide hammer, a mini-lifter, and an assortment of tab sizes. A heat gun or glue gun with consistent temperature control is non-negotiable here.
- Finishing tools. Stock at least two tap-down tips (nylon and brass), a blending hammer, and a set of knockdown tools in graduated sizes.
Professional PDR kits range from $5,000 to $20,000 depending on tool quality, brand, and kit size. That range reflects the difference between a kit built for occasional use and one built for daily production volume. Entry-level starter kits cost $500–$1,500 but lack the tool range needed for production work.
Pro Tip: Label each tool section in your storage case by workflow stage. When you are mid-repair and need the next tool fast, a labeled case cuts search time to zero.
How to use PDR tools step by step for effective dent repair
Effective PDR is more about technique, patience, and accurate visualization than force. Over-pushing risks creating high spots while insufficient work leaves visible dents. The following process applies to the majority of standard dent repairs.
- Panel inspection. Position the LED reflection board at a 45-degree angle to the damaged panel. Read the line distortion to map the dent's full perimeter, depth, and any secondary damage around the impact point.
- Access preparation. Remove trim panels, door cards, or weather stripping as needed. Use plastic pry tools first to protect clips. Metal tools go in only when plastic tools cannot generate enough leverage.
- Initial rod work. Insert the appropriate rod through the access point and position the tip directly under the deepest part of the dent. Apply slow, upward pressure in small increments. Check the LED board after every two or three pushes.
- Glue pulling for restricted areas. Clean the dent surface with isopropyl alcohol before applying the tab. Bond the tab with a consistent glue temperature, wait for full cure, then pull with a mini-lifter using short, controlled strokes.
- Tap-down and blending. After the main mass of the dent is level, switch to tap-down tools to address any high spots. Work from the outside of the repair area toward the center to avoid pushing metal outward.
- Final inspection. Move the LED board to multiple angles and check the panel under both artificial and natural light. A repair that passes both checks will hold up to customer scrutiny.
The difference between a good PDR technician and a great one is not the tools they own. It is how long they spend reading the panel before they ever touch it. Most errors happen because the technician started working before they fully understood the dent's shape.
Common mistakes to avoid:
- Skipping the LED board check between pushes
- Using a slide hammer on thin aluminum without switching to a mini-lifter
- Applying glue tabs to a panel that has not been cleaned and dried
- Rushing the tap-down stage because the dent looks "close enough"
How do certification standards shape professional PDR tool use?
Organizations like NAPDRT and PDR University provide certification programs that define best practices for tool use, lighting standards, and repair quality. Certification is not just a credential. It sets a technical floor that protects both the technician and the vehicle owner.
Certified technicians follow protocols that directly affect tool selection:
- Lighting standards. Certified programs specify minimum lighting quality for panel inspection, which drives the choice of LED board type and placement.
- Access protocols. Proper disassembly procedures are part of certification training, reinforcing the use of dedicated trim tools rather than improvised methods.
- Finishing criteria. Repair quality benchmarks define what "complete" looks like, pushing technicians to invest in quality tap-down and blending tools rather than stopping at "good enough."
- Ongoing skill development. PDR University and similar programs offer continuing education that keeps technicians current on new tool types, particularly for aluminum panels and advanced glue pulling systems.
Tool choice directly affects repair durability and customer satisfaction. A technician using worn or low-quality rods produces inconsistent results even with excellent technique. Investing in professional-grade equipment is not optional for anyone working at production volume.
Key Takeaways
Professional PDR tools work best when selected by workflow stage, used with disciplined technique, and supported by quality lighting at every step of the repair process.
| Point | Details |
|---|---|
| Tool selection by workflow | Build your kit around inspection, access, metal movement, glue pulling, and finishing stages. |
| LED boards are non-negotiable | Accurate dent visualization requires quality lighting before and during every repair. |
| Glue pulling fills access gaps | Use mini-lifters for delicate metal and slide hammers for standard pulls on inaccessible panels. |
| Technique beats tool count | Incremental pushes and constant LED checks produce better results than large, aggressive movements. |
| Certification raises the floor | NAPDRT and PDR University standards define tool use protocols that protect repair quality. |
What I have learned from years of working with PDR tools
Most technicians who struggle with PDR are not struggling because of their tools. They are struggling because they bought a large kit and assumed the tools would teach them the technique. That is backwards. The tools amplify whatever skill level you already have. A poor technique with a $15,000 kit still produces poor repairs.
The single biggest shift I have seen in technicians who improve fast is this: they slow down at the inspection stage. They spend twice as long reading the panel with the LED board before they pick up a rod. That patience pays off because they push less, correct less, and finish faster. The repair looks cleaner because they understood the dent before they touched it.
On tool quality, I will say this plainly: buy fewer tools and buy better ones. A set of five high-quality rods in the right profiles for your most common repairs outperforms a 100-piece kit full of rods you will never reach for. Spring steel rods hold their shape under repeated use. Cheap alternatives flex inconsistently, which makes controlled pushing nearly impossible.
The finishing stage is where most technicians cut corners, and it is exactly where the customer's eye goes first. A tap-down set with graduated tip sizes gives you the control to blend the last 5% of a repair without creating new problems. That last 5% is what separates a repair the customer notices from one they never think about again.
— Martin
Dent-boys: professional PDR expertise and tools in one place
Dent-boys has built its reputation on delivering factory-quality auto hail repair results without repainting, using the same professional-grade equipment covered in this guide. Every repair comes with a $0 deductible, a rental vehicle during service, and a lifetime warranty on the work.

For technicians looking to see professional PDR tools applied at a production level, or for vehicle owners who want their car restored by certified specialists, Dent-boys offers free estimates, pick-up and delivery, and a track record backed by customer testimonials. The standard of work starts with the right tools and the right hands behind them.
FAQ
What tools are included in a professional PDR kit?
A professional PDR kit includes rods, whale tail tools, glue tabs, slide hammers, mini-lifters, LED reflection boards, tap-down tools, and trim removal tools. Professional-grade sets are built with heat-treated stainless steel handles for daily production use.
How does glue pulling work in paintless dent repair?
Glue pulling bonds adhesive tabs to the dent surface and uses a slide hammer or mini-lifter to pull the metal back into position. It is the standard method for panels where rear access is impossible, such as roofs and pillars.
Why are LED reflection boards critical for PDR?
LED reflection boards project parallel lines across the panel, revealing the exact shape, depth, and high spots of a dent. Without them, technicians cannot accurately track repair progress or confirm a finished result.
How much does a professional PDR tool kit cost?
Professional PDR kits range from $5,000 to $20,000 depending on quality and kit size. Entry-level training kits cost $500–$1,500 but lack the tool range required for production-volume repair work.
What certifications apply to professional PDR technicians?
NAPDRT and PDR University are the primary certification bodies for paintless dent repair. Their programs cover tool use standards, lighting requirements, and repair quality benchmarks that define professional-level work.