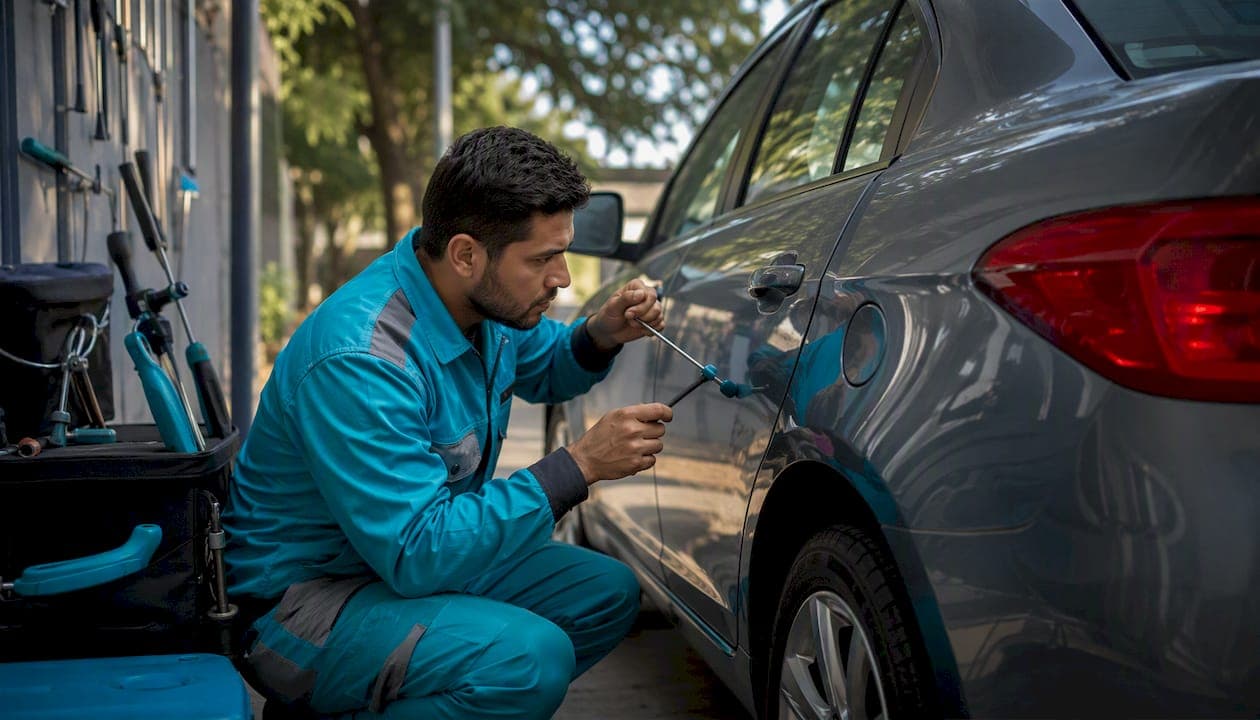
Paintless dent repair (PDR) is the best metal reshaping dent repair method for most situations. It preserves your factory finish, uses no filler, and costs a fraction of a traditional body-shop job. The exceptions are real, though: cracked paint, deep metal compression, sharp creases, structural damage, or a dent that crosses a weld seam all push you toward conventional repair.
Quick verdict:
- Best overall method: PDR. Fastest, cheapest, and leaves the factory paint intact on dents under roughly 50 mm with no paint damage.
- When DIY is reasonable: Small, shallow dings on flat panels (door skins, fenders) with intact paint. Suction cups or a glue-tab kit are your tools.
- Call a pro: Any crease, cracked or chipped paint, large stretched area, body-line damage, or dent over 150 mm. Delaying prompt dent repair risks rust and a bigger bill later.
Table of Contents
- How the main dent repair methods compare at a glance
- A method-by-method breakdown of every major technique
- How aluminum, steel, and plastic panels change everything
- How to safely attempt DIY dent repair, step by step
- Access, safety, and the dents you should never attempt yourself
- What tools you actually need (and what to rent vs. buy)
- What repairs actually cost and how long they take
- What professional shops do differently (and why it matters)
- Key Takeaways
- Why most DIY dent repairs cost more in the long run
- Dent-boys makes professional PDR straightforward
- Useful references and further reading
How the main dent repair methods compare at a glance
| Method | Best for (dent type) | Material compatibility | DIY difficulty | Typical cost range | Repaint risk | Time to complete |
|---|---|---|---|---|---|---|
| Paintless dent repair (PDR) | Round dings, hail, shallow dents | Steel (ideal); aluminum (specialist needed) | Pro only for best results | Cost varies per panel | None when done correctly | Time varies from hours to days |
| Suction cup pull | Shallow round dents, flat panels | Steel; limited on aluminum | Easy | Low-cost kit options available | Low | Short duration |
| Glue-tab + slide hammer | Medium dents, no rear access | Steel; caution on aluminum | Moderate | Affordable kits are available | Moderate if over-pulled | Typically takes 1 to 2 hours |
| Stud-weld / pin pulling | Larger dents, no rear access | Steel only | Pro/advanced DIY | Professional pricing varies | Low with care | Several hours |
| Hammer-and-dolly + slapper | Creases, crown correction | Steel primarily | Advanced DIY / pro | Professional pricing varies | Moderate | Multiple hours |
| Shrinking disc / torch shrink | Stretched metal, oil-canning | Steel only (non-structural mild steel) | Pro only | Professional pricing varies | Low if sequenced correctly | Several hours |
| Traditional body shop (filler + repaint) | Severe dents, cracked paint, structural | Steel and aluminum | Pro only | Pricing varies | Repaint required | Duration varies from days to several days |
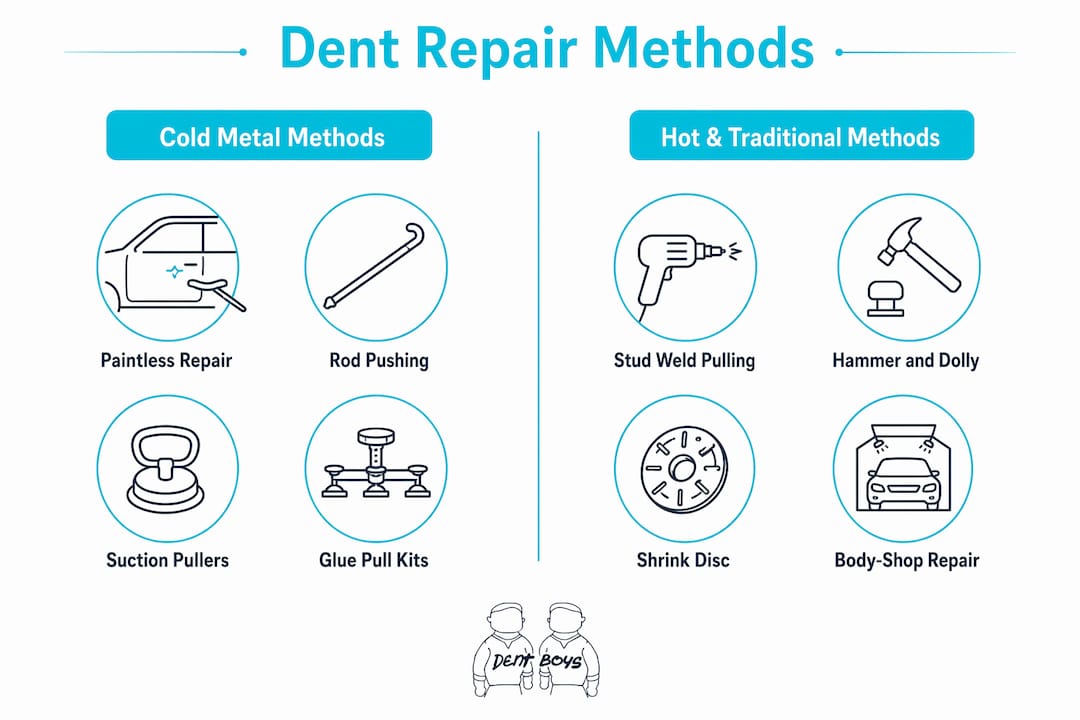
A method-by-method breakdown of every major technique
Paintless dent repair (PDR)
PDR is the gold standard for minor to moderate metal dent repair. A technician uses specialized rods and picks to massage the metal from behind the panel, restoring the original contour without touching the paint. The result, when done right, is invisible.
Pros: No filler, no paint, factory finish preserved, fast turnaround, and the highest resale-value protection of any method.
Cons: Requires trained hands and a light board to read reflections accurately. Not every panel has rear access.
Ideal dents: Soft round dings, hail damage, shallow door dents with intact paint. PDR is excluded when paint is cracked, metal has deep compression or stretch, sharp creases exist, or body-line integrity is compromised.
DIY step summary: PDR is technically possible for experienced DIYers using rod kits, but the learning curve is steep. For most car owners, this is a professional job.
Rod and behind-panel pushing (PDR-style)
This is the manual version of PDR: insert a rod through a factory access hole or behind a removed trim panel and apply steady upward pressure from the low point outward toward the edges. It works on the same principle as professional PDR but without the specialized picks and light board.
Pros: No tools on the paint surface, no adhesive risk.
Cons: Requires disassembly, limited to panels with accessible factory openings, and easy to over-push and create a crown.
Common mistake: Pushing the center first. Always work from the perimeter inward, using reflected light to track highs and lows.
Suction cups and purpose-built dent pullers
A dedicated suction-cup dent puller (not a household plunger) creates even pulling force across a shallow, round dent on a flat panel. Wet the surface, center the cup, and pull steadily.
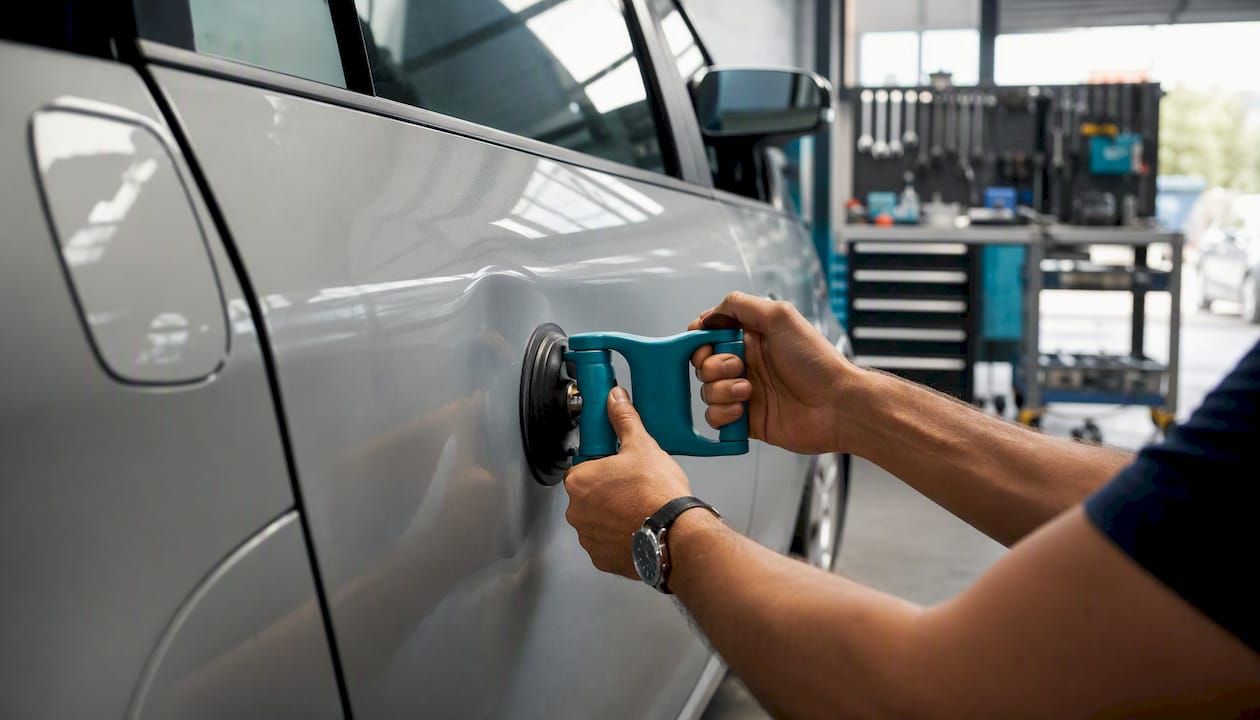
Pros: Cheapest entry point, zero paint risk when used correctly, fast.
Cons: Only works on shallow dents with gradual contours. Useless on creases, body lines, or anything with a sharp center.
Ideal dents: Shallow round dings under roughly 3 inches on door skins, hoods, and fenders.
Material note: Works on steel; less reliable on aluminum because aluminum lacks the elastic memory that lets steel spring back.
Glue-tab + slide hammer (glue pull kits)
Glue-pull kits are the practical DIY upgrade when rear access is blocked. Heat a PDR glue stick, apply it to a plastic tab, press the tab onto the dent center, wait for the glue to set, then use a slide hammer or bridge puller to draw the metal out in controlled, directional pulls. Glue-tab kits cost roughly $30–$80 and can restore 70–90% of soft dents invisibly with practice.
Pros: No rear access needed, moderate cost, widely available.
Cons: Over-pulling creates a permanent high spot. Craft hot glue damages paint; use PDR-specific glue only. Residue removal requires isopropyl alcohol and patience.
Common mistake: Using too much pull force in one shot. Multiple light pulls beat one aggressive yank every time.
Stud-weld / pin pulling
A stud welder attaches small metal pins directly to the dent surface. A slide hammer or pulling bridge then draws the metal out pin by pin. This is the professional method for larger dents without rear access and is standard in body shops for deep pulls before filler work.
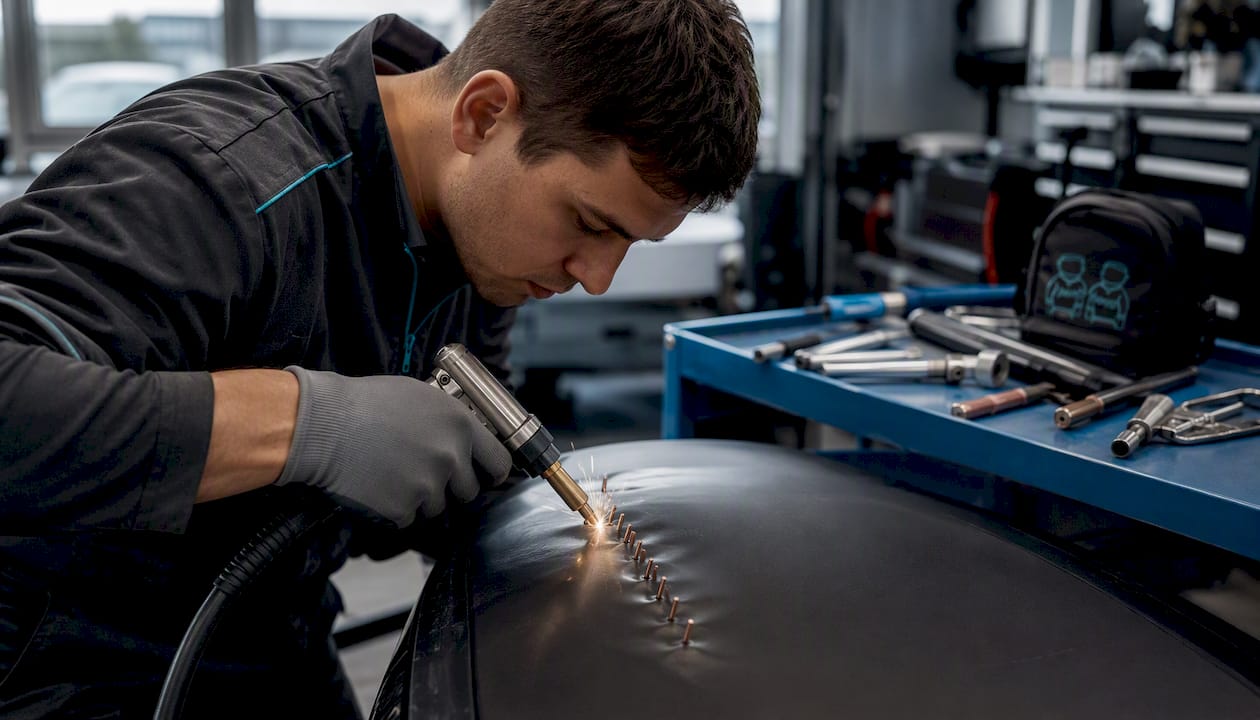
Pros: Precise, works on large areas, distributes pull force well.
Cons: Steel only. Requires welding equipment and skill. Leaves small weld marks that need grinding and finishing.
Ideal dents: Larger dents on door skins, quarter panels, and hoods where glue-pull force is insufficient.
Hammer-and-dolly plus slapper work
A dolly held against the back of the panel and a body hammer or slapper on the outside work together to reshape metal. The slapper, a wide flat tool, distributes force across a broader area than a hammer alone, reducing localized stretch. Slapper and dolly work corrects arrangement (position); shrinking handles area (surface amount). Use many light blows and off-dolly technique to avoid stretching the metal further.
Pros: Highly controllable, works on creases and crowns, no adhesive or heat required.
Cons: Requires skill to avoid stretching. Direct on-dolly hammering for too long re-stretches the metal.
Ideal dents: Creases, crowns, and body-line dents after rough shaping. This is the foundation of professional metal work.
Shrinking methods: shrinking disc and torch shrinking
When metal is stretched beyond a small amount, reshaping alone leaves a loose, oil-canning panel. Shrinking corrects the surface area. A shrinking disc (an abrasive disc run on an angle grinder) generates friction heat that contracts the stretched area. Torch shrinking uses a controlled flame for the same effect.
The professional sequence matters: rough out the dent first, then use slapper and dolly to correct arrangement, then apply the shrinking disc or torch to correct area. Running the disc before arrangement is corrected causes problems. Severe oil-canning and stretch often need torch shrinking or repeated shrinking-disc passes; over-shrinking can be corrected by re-stretching with slapper and dolly.
Pros: Corrects stretched metal that no other cold method can fix.
Cons: Steel only (non-structural mild steel with OEM permission). Requires temperature control. Over-shrinking is a real risk.
Common mistake: Heating before confirming the metal type. A steel-looking panel may be high-strength steel or aluminum, both of which require different procedures.
Heat-and-quench and hot-water methods (plastic bumpers only)
Boiling water poured over a soft dent on a thermoplastic bumper softens the plastic enough to let you push it back from behind. A hairdryer followed by a blast of compressed air creates thermal shock that can pop shallow dents on thermoplastic bumpers. These techniques work reliably on thermoplastic bumpers (TPO) but not on steel or aluminum panels. Steel does not soften at 212°F.
Pros: Zero cost, no tools needed for bumper dents.
Cons: Completely ineffective on metal panels despite widespread internet claims.
Traditional body-shop repair (filler, sand, repaint)
When the metal is severely stretched, paint is cracked, or the panel's structural integrity is affected, filler and respray or panel replacement is the correct solution. Metal work should precede filler application, and excessive filler thickness above 6–8 mm is a common long-term failure cause. The shop pulls the metal as close to shape as possible first, then applies filler, blocks it flat, primes, and repaints.
Pros: Handles damage that no reshaping method can fix.
Cons: Breaks the factory paint seal, affects resale value, and is the most expensive and time-consuming option.
Ideal situations: Cracked paint, deep compression, sharp creases that cross body lines, structural damage, or prior repairs that complicate reshaping.
How aluminum, steel, and plastic panels change everything
Steel has what technicians call metal memory. Apply pressure from behind and it tends to spring back toward its original shape, which is why PDR works so well on steel door panels. Aluminum lacks that elastic memory entirely. Once deformed, it stays deformed unless you work it back precisely, and it has a lower elongation limit, meaning it tears or work-hardens faster than steel under repeated tool contact.
Aluminum dent repairs require specialized tools, precision technique, and often heat to prevent further work hardening or cracking. Shops that handle aluminum must also segregate their tools from steel work to prevent galvanic corrosion. That is why an aluminum hood repair costs more and takes longer than the same job on a steel panel, even when the dent looks identical.
Aluminum warning: Never use a steel shrinking disc or steel-contact dolly directly on an aluminum panel. Cross-contamination embeds steel particles in the aluminum surface and triggers galvanic corrosion. Any shop working your aluminum panel should be using dedicated aluminum-only tools.
Plastic bumpers follow different rules entirely. Thermoplastic bumper covers (TPO) respond to heat because the material softens and reshapes. Hot water or a heat gun can restore a soft bumper dent in minutes. Sheet metal, whether steel or aluminum, does not respond this way.
Mixed-material panels and factory adhesive-bonded skins add another layer of complexity. If you are unsure whether a panel is steel, aluminum, or a composite, stop before inserting any tool. Check the vehicle's repair information or ask a shop. Guessing wrong on material type is one of the fastest ways to turn a $200 repair into a $1,500 panel replacement.
Pro Tip: For classic or collector cars, aluminum and early fiberglass panels need specialist assessment before any reshaping attempt. The collector car dent repair guide covers the specific considerations for vintage panels.
How to safely attempt DIY dent repair, step by step
Method 1: Suction-cup pull
- Wash and dry the panel surface completely. Any dirt or wax breaks the seal.
- Wet the suction cup and the dent area lightly with water.
- Center the cup over the lowest point of the dent.
- Apply steady, even pulling force. Do not jerk.
- If the dent does not move after three attempts, stop. Suction cups will not fix creases or dents with a locked crown.
- Inspect under a light source. If a high spot appeared, do not push it down with your thumb. Seek a PDR estimate.
Stop condition: Any paint cracking, a crown that locks up, or oil-canning means this method has reached its limit.
Method 2: Glue-tab + controlled slide hammer
- Clean the dent surface with isopropyl alcohol and let it dry fully.
- Heat a PDR glue stick (not craft hot glue) and apply it to the center of the tab.
- Press the tab firmly onto the dent center and hold for 60 seconds.
- Attach the slide hammer or bridge puller to the tab.
- Pull in short, controlled strokes, pausing to check progress after each pull.
- Work from the outer edge of the dent toward the center, not the other way around.
- Once the dent is level, cool the glue with a damp cloth and twist the tab off gently.
- Remove glue residue with isopropyl alcohol. Never scrape it with a metal tool.
Stop condition: Any paint lifting, a high spot that will not flatten, or a crown that locks.
Method 3: Behind-the-panel rod pushing
- Remove the interior trim panel or door card carefully, noting every clip location.
- Check behind the panel for wiring harnesses, airbag components, window regulators, and reinforcement braces before inserting any tool.
- Use a smooth-tipped rod (no sharp edges) and apply gentle upward pressure at the outer edge of the dent.
- Work in small movements, re-reading the reflection after each push.
- Never push the center first. Start at the perimeter and spiral inward.
- Reinstall trim carefully. Broken clips are a separate repair.
Stop condition: Any resistance from a hidden brace, wiring contact, or paint cracking on the outside.
Method 4: Hot-water bumper technique (plastic bumpers only)
- Confirm the bumper is thermoplastic (TPO), not metal or carbon fiber.
- Boil water and pour it slowly over the dented area.
- Immediately reach behind the bumper and push the dent outward with your palm.
- Hold pressure for 20–30 seconds while the plastic cools.
- Repeat once if needed. More than two cycles risks warping the bumper.
Pro Tip: Use a reflection board or even a straight fluorescent shop light held at a low angle to read panel highs and lows. Reflections pinch at highs and spread at lows. Checking after every small movement is the single habit that separates a clean repair from a lumpy one.
After any DIY attempt, clean the area with a mild car wash soap, inspect the paint under direct sunlight, and consider a touch-up paint guide if minor scuffs appeared during the process.
Access, safety, and the dents you should never attempt yourself
Before inserting any tool behind a panel, run through this checklist:
- Airbag and restraint components: Side-curtain airbag wiring runs through door pillars and along rooflines. Disturbing these components is a safety issue, not just a repair complication.
- Wiring harnesses: Door skins carry window, mirror, lock, and speaker wiring. A rod pushed past a harness can cut insulation and create an electrical fault.
- Intrusion beams: Most modern doors contain steel reinforcement beams that block rod access to the lower third of the door skin. Forcing a rod past one bends the beam.
- Foam filling and adhesive-bonded skins: Some panels are foam-filled or have skins bonded with structural adhesive. Inserting tools into these areas damages the bond.
- Glass and trim interference: Rear quarter panels often have glass or trim directly behind the skin with no safe rod path.
I-CAR guidance restricts drilling factory openings, removing foam for PDR, elongating or damaging existing openings, or harming adjacent parts and the finish. A factory opening must still be protected and suitable for the intended route. Do not force a rod past a brace, wiring path, glass mechanism, or restraint component merely because an opening exists.
Beyond access, some dents simply cannot be fixed by reshaping. Cracked or lifted paint means the metal has already moved beyond what the coating can follow. Sharp creases and body-line damage involve designed contours that are difficult to restore without conventional repair. Oil-canning from stretched metal requires shrinking, not just pushing. Dents that cross a weld seam or span more than 150 mm are generally better handled by a professional, and damage over that threshold is best referred to a body shop or a specialist PDR technician.
When you hit any of these conditions, document the dent with photos before touching it, note the paint condition and any existing chips, and get a professional PDR or body-shop estimate. That documentation protects you if the shop later claims damage you did not cause.
For a detailed breakdown of when repair crosses into replacement territory, the dent repair vs panel replacement guide lays out the decision criteria clearly.
What tools you actually need (and what to rent vs. buy)
Entry-level DIY kit ($20–$150)
- Dedicated suction-cup dent puller (not a plunger)
- Glue-tab kit with bridge puller or mini slide hammer
- PDR glue sticks (not craft hot glue)
- Isopropyl alcohol (70% or higher) for glue removal
- Microfiber cloths
Intermediate tools ($100–$600)
- Reflection/light board for reading panel highs and lows
- Basic rod set (smooth tips, various lengths)
- Slapper and a set of dollies
- Body file or flexible straightedge for surface reading
- Plastic trim removal tools (for safe panel disassembly)
Professional equipment ($500 and up)
- Stud welder with shrinking tip
- Shrinking discs (angle grinder attachment)
- Induction heater (for adhesive removal and controlled heat shrinking)
- Full PDR rod and pick set with specialized tips
- Temperature-control tools (heat sticks, thermal labels)
Rental vs. buy: Shrinking discs, stud welders, and induction heaters are worth renting or leaving to a shop unless you do body work regularly. The learning curve on shrinking equipment is steep, and a mistake on a stretched panel can require a full respray. Suction cups and glue-tab kits are cheap enough to own.
PPE: Safety glasses for any hammer or grinding work. Heat-resistant gloves when using a torch or boiling water. Nitrile gloves when handling solvents.
What repairs actually cost and how long they take
| Method / scenario | Typical cost range | Typical time to complete |
|---|---|---|
| DIY suction cup or glue-tab (supplies only) | $20–$150 | 30 minutes to 2 hours |
| Professional PDR, single small ding | $30–$80 | 1–2 hours |
| Professional PDR, door panel (multiple dings) | — | Half day |
| Professional PDR, full hail damage job | — | 2–10 days |
| Stud-weld / slide-hammer pull (shop) | $200–$600 | 2–4 hours |
| Hammer-and-dolly + shrinking (shop) | — | 4–8 hours |
| Traditional body shop (filler + repaint, one panel) | — | 1–5 days |
Several factors push costs up or down: panel material (aluminum costs more), number of dents, whether paint is cracked (forces a repaint), access difficulty, and whether insurance is involved. A single door ding handled same-day by a mobile PDR tech is a very different job from a full hail-damage restoration on an aluminum-intensive vehicle.
Turnaround windows vary accordingly. A single-panel PDR job is often same-day or next-day. A large hail job with dozens of dents across multiple panels can run several days to a couple of weeks depending on shop volume. For a realistic picture of what to expect, the vehicle dent repair timeline guide breaks down the stages from drop-off to pickup.
What professional shops do differently (and why it matters)
The biggest gap between a DIY attempt and a professional result is not the tools. It is the diagnostic sequence. Professionals assess five factors before touching a dent: paint and coating condition, metal stretch and geometry, panel material and construction, location relative to edges and reinforcement, and safe access or a controlled pulling route. A favorable dent shape does not override cracked paint, and a reachable low does not override unsafe access.
From there, the professional sequence for metal shaping follows a specific order. Rough out the dent first, then use slapper-and-dolly work to correct arrangement (position), then apply shrinking to correct area (surface amount) if the metal is stretched. Running a shrinking disc before arrangement is corrected causes problems that are harder to fix than the original dent. The slapper distributes force across a wider contact area than a body hammer, reducing localized stretch.
Pro Tip: Read the panel under a reflection board or a straight shop light before and after every small movement. A low spreads reflected lines; a high pinches them. Stop and re-read rather than continuing just because the dent appears to be moving.
Pro Tip: Never push the center of a dent first. Technicians map the crown and work from the perimeter inward. Pushing the center locks the crown and creates a raised spot that is significantly harder to correct than the original dent.
Pro Tip: After shrinking, check the entire panel, not just the shrink point. A successful shrink at one location can shift a crown or create a low elsewhere. Feel the surface and re-read the reflection from multiple angles before calling the job done.
Precision dent restoration methods covers the professional diagnostic framework in more detail for readers who want to go deeper on technique.
Key Takeaways
PDR is the right starting point for most metal dent repairs because it preserves the factory finish, costs less than conventional bodywork, and leaves no filler that can crack or absorb moisture over time.
| Point | Details |
|---|---|
| PDR is the default best method | Preserves factory paint, no filler, fastest value for dents under 50 mm with intact paint. |
| Material changes the method | Aluminum lacks metal memory and needs specialist tools; steel is more forgiving for PDR and cold work. |
| Sequence matters for metal shaping | Correct arrangement with slapper and dolly first, then shrink area. Reversing this order creates new problems. |
| Hard stop signs for DIY | Cracked paint, sharp creases, body-line damage, dents over 150 mm, or any airbag/wiring risk means call a pro. |
| Dent-boys is the pro PDR option | Dent-boys offers free estimates, pick-up and delivery, $0 deductible support, a rental vehicle, and a lifetime warranty on repairs. |
Why most DIY dent repairs cost more in the long run
The most common scenario in a body shop is not a fresh dent. It is a dent someone tried to fix first. A glue-tab kit used with craft hot glue lifts clear coat. A rod pushed past a wiring harness creates an electrical fault. A shrinking disc run on aluminum warps the panel permanently. Each of these turns a $150 PDR job into a $600 repaint or a $1,200 panel replacement.
The conventional wisdom says "try DIY first and call a pro if it fails." That logic works for suction cups on a shallow door ding. It breaks down the moment a crease, a body line, or an aluminum panel is involved. Those are not harder versions of the same repair. They are categorically different jobs that require different tools, different sequences, and the ability to read a reflection board accurately.
The smarter approach: use the five-factor assessment (paint condition, metal geometry, material, location, access) before touching anything. If two or more factors raise a flag, get a professional estimate first. A free estimate costs nothing. A botched DIY attempt on an aluminum door panel can cost more than the car payment.
Dent-boys makes professional PDR straightforward

When reshaping limits are reached, or when you simply want the job done right the first time, Dent-boys delivers professional paintless dent repair with none of the usual friction. The service is built around convenience: free estimates, pick-up and delivery so you never have to rearrange your schedule, and $0 deductible support for insurance-covered repairs. A rental vehicle keeps you moving while your car is being restored.
Every repair comes with a lifetime warranty, which means the factory-finish result is guaranteed. No filler, no repaint, no guessing whether the color match will hold in two years.
- Free estimate: Know the cost before committing to anything.
- Pick-up and delivery: Dent-boys comes to you.
- $0 deductible support: Insurance claims handled without out-of-pocket surprises.
- Rental vehicle coverage: Stay mobile during the repair.
- Lifetime warranty: The repair is guaranteed for as long as you own the vehicle.
Whether it is a single door ding, a parking-lot crease, or a full hail-damage restoration, get your free PDR estimate from Dent-boys and find out what professional results actually look like.
Useful references and further reading
- National Association of Paintless Dent Repair Technicians (NAPDRT): The industry body for PDR standards in the US. Covers PDR exclusion criteria, technician certification, and when conventional repair is required.
- I-CAR Straightening Exterior Panels guidance: Technical guidance on safe access, shrinking sequences, and panel repair protocols used by collision repair professionals.
- Proshaper technique guides: Practical explanations of arrangement vs. area correction, slapper-and-dolly sequencing, and shrinking disc use for metal shaping.
- How Vehicle Material Affects Dent Repair Techniques (MyCarQuest): Clear breakdown of how steel, aluminum, and composite panels respond differently to each repair method.
- Shrink Sheet Metal: Auto Body Repair Guide (GarageWelding): Step-by-step shrinking procedure with OEM compliance notes and safety requirements.
- Dent-boys: Auto Hail Repair and PDR Services: Dent-boys' primary service page covering hail damage repair, free estimates, and the full range of PDR services available.
- Dent repair without painting explained: Dent-boys' guide to the decision process between PDR and conventional methods, written for car owners.
- No-appointment dent repair: how the process works: Operational detail on Dent-boys' quick-service options and what to expect from drop-off to pickup.