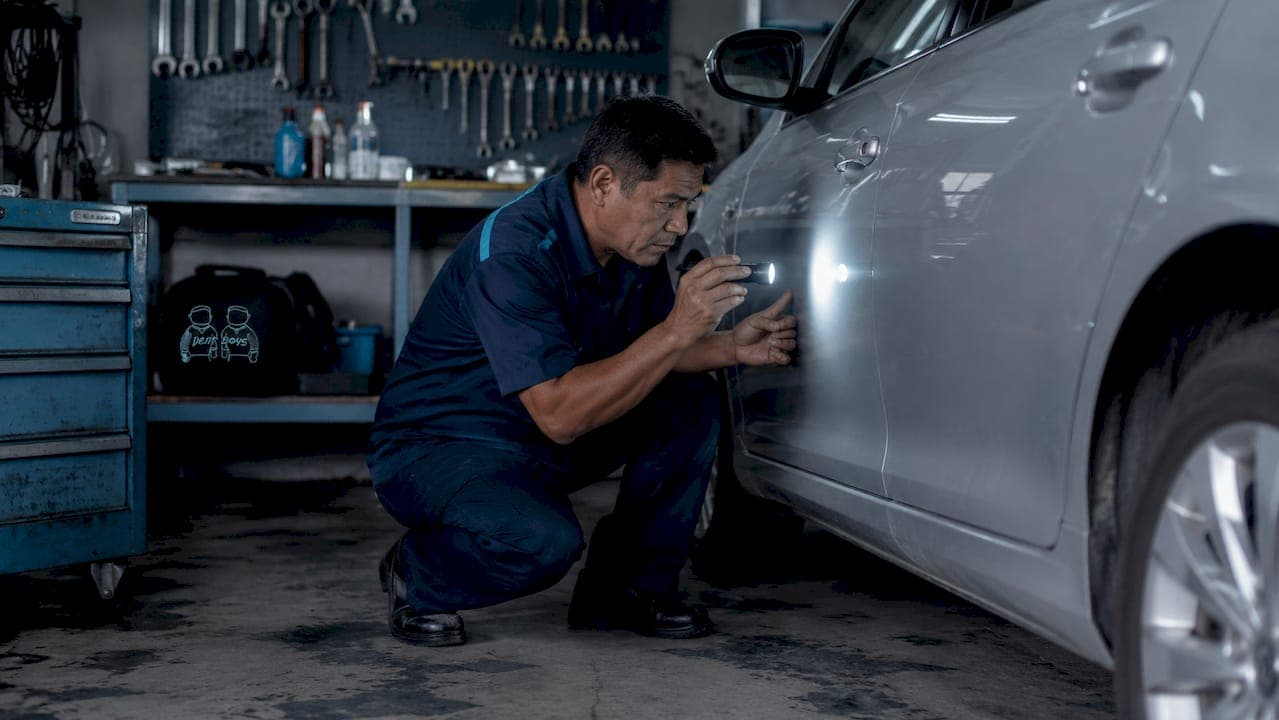
A dent inspection is a structured evaluation of your vehicle's exterior and underlying structure to identify all damage that affects repair needs and safety. Most car owners expect a quick glance at the obvious ding, but a professional dent inspection process goes far deeper. Technicians check hidden panels, structural alignment, sensor integrity, and adjacent trim. Understanding what happens during dent inspection helps you ask better questions, avoid repair surprises, and make confident decisions about your vehicle.
What happens during a dent inspection: the key steps
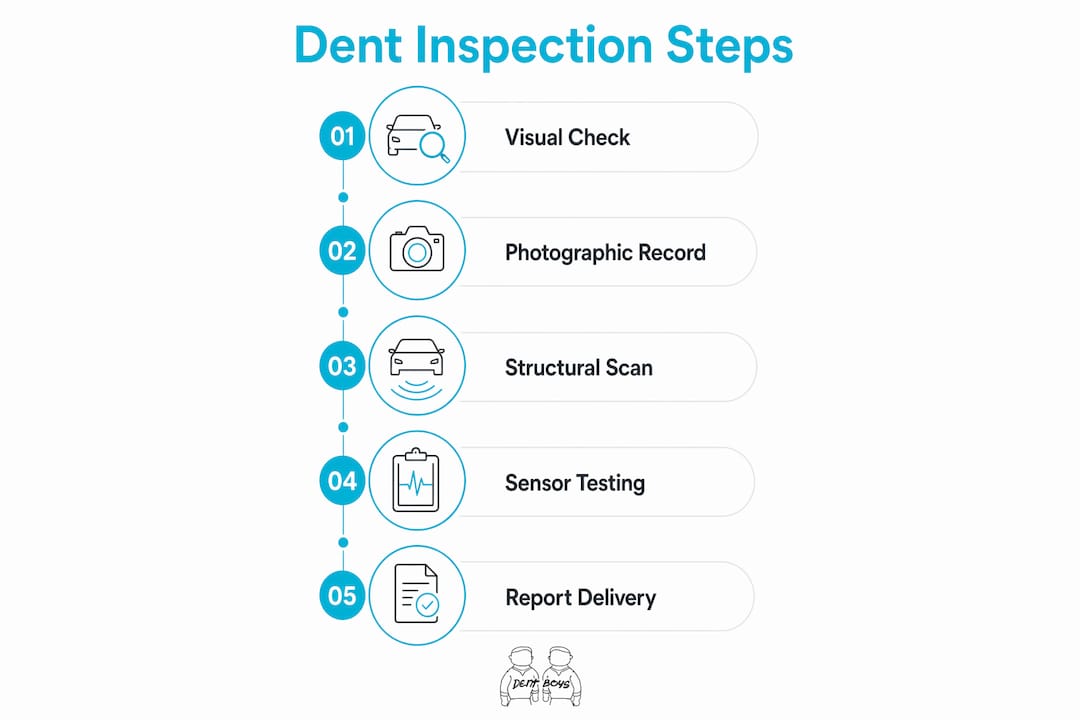
A professional dent inspection follows a clear sequence. Each step builds on the last, so nothing gets missed and the final repair estimate reflects the vehicle's true condition.
-
Initial visual scan. The technician walks the entire vehicle under natural light, noting every dent, scratch, and surface irregularity. This pass establishes a baseline before any tools come out.
-
Specialized lighting examination. Technicians use focused inspection lighting to magnify small dent variations that are invisible under standard shop lighting. Specialized lighting reveals tiny dents and subtle surface distortions that the naked eye misses in normal conditions. This step alone often uncovers two or three additional damage points on a car that appeared to have only one dent.
-
Adjacent panel and trim check. A comprehensive dent inspection includes checking adjacent panels, trim, mounting areas, and fitment around doors, hoods, bumpers, and lights to identify secondary damage. A dent on a door, for example, can push the door frame out of alignment and affect the window seal.
-
Structural alignment measurement. The technician checks panel gaps and door fitment with measuring tools to detect any frame or structural shift. Even a minor collision can move a panel by a few millimeters, which affects how the car closes and seals.
-
Hidden component inspection. The technician looks behind body panels for damage to brackets, supports, and wiring. This step is covered in detail in the next section.
-
Photo documentation. Photo documentation of each dent with measurement references is standard practice for modern inspections. These photos form the legal and financial record that supports the repair estimate.
-
Written report. The technician compiles findings into a report that lists each damage point, its location, severity, and recommended repair method.
Pro Tip: Ask the technician to walk you through the photos before you leave. Seeing each damage point on your own vehicle makes the repair estimate far easier to understand and accept.
How do inspectors identify hidden damage behind dents?

Hidden damage is the most misunderstood part of the dent inspection process. A dent that looks minor on the surface can mask significant structural or electronic damage underneath.
Common hidden damage types inspectors look for include:
- Bracket and support damage. Bumper brackets, hood supports, and door reinforcement bars can bend or crack without any visible sign on the outer panel.
- Sensor interference. Modern vehicles carry parking sensors, blind-spot monitors, and backup cameras mounted directly behind body panels. A dent in the right location can crack a sensor housing or shift its angle enough to cause false readings.
- Wiring harness contact. Sharp dents can pinch wiring routed along the inside of door panels, leading to electrical faults that appear days or weeks after the original impact.
- Rust entry points. Any dent that breaks the paint barrier creates a path for moisture. Inspectors check for early rust formation, especially on older vehicles or those in high-humidity climates.
Thorough inspections in 2026 check for hidden damage behind panels, structural alignment, and sensor integrity affecting safety and performance. That standard exists because undetected sensor damage, in particular, creates real safety risks on the road. A car owner who skips a thorough inspection and opts for a cosmetic-only fix may pass a visual check but still drive a vehicle with compromised safety systems.
The importance of dent inspection extends beyond appearance. Hidden structural damage, left unrepaired, accelerates rust, weakens crumple zones, and reduces resale value faster than the visible dent itself.
What determines whether a dent qualifies for paintless dent repair?
Not every dent qualifies for paintless dent repair (PDR), the technique Dent-boys specializes in. The inspection findings directly determine which repair method applies.
PDR suitability criteria
PDR is ideal for shallow, small dents on flat panels but often unsuitable for dents near edges, seams, or with deep creases requiring structural correction. The inspection measures three key variables: size, location, and depth.
| Dent characteristic | PDR suitable | Traditional bodywork required |
|---|---|---|
| Small, shallow dent on flat panel | Yes | No |
| Dent near door edge or seam | Rarely | Usually |
| Deep crease with paint cracking | No | Yes |
| Dent over a structural line | No | Yes |
| Hail damage on hood or roof | Often yes | Sometimes |
Why location matters more than size
A dent the size of a golf ball on the center of a hood is often a straightforward PDR job. The same size dent near the door edge is a different problem entirely. Dents near vehicle edges and seams can hide distortions that affect door fitment and safety. The metal near edges has less flexibility, so the repair technique must account for the risk of cracking the surrounding paint or distorting the panel gap.
Dents that sit over structural reinforcement points require traditional bodywork because the technician cannot access the back of the panel with PDR tools. These repairs take longer and cost more, which is why the inspection report must identify location accurately before any estimate is finalized.
Pro Tip: If your car has hail damage, ask specifically whether the roof and hood dents are PDR-eligible. Hail dents on flat panels are among the best candidates for PDR, and a hail damage assessment can save you significant money compared to a conventional body shop estimate.
How to prepare for a dent inspection and read the report
Preparation before the inspection protects you from disputes and helps you understand the findings clearly.
- Photograph your vehicle before the appointment. Walk around the car and shoot each panel in good lighting. These photos establish your vehicle's pre-inspection condition and protect you if any new damage appears during the shop visit.
- Note existing damage in writing. A simple list of known dents, scratches, and chips, with their locations, gives the technician a starting point and prevents pre-existing damage from appearing as new findings.
- Clean the vehicle beforehand. Dirt and grime hide small dents. A clean surface lets the technician work faster and spot damage more accurately.
- Ask for a copy of the inspection report. Photo documentation and early inspection help car owners dispute unfair charges and control repair costs. This applies equally to lease returns, insurance claims, and private sales.
- Review the photos with the technician. A good shop will show you each damage point on the actual vehicle before you sign anything. If a shop refuses to do this, treat it as a warning sign.
A detailed inspection report typically includes the location of each dent, its approximate size, the recommended repair method, and an estimated cost range. Transparent shops communicate why certain operations are included in estimates, which prevents surprise costs and builds trust. If a line item on your report is unclear, ask for a plain-language explanation before approving any work.
Key Takeaways
A professional dent inspection covers far more than visible surface damage. It is the foundation for accurate repair planning, honest cost estimates, and vehicle safety.
| Point | Details |
|---|---|
| Inspection scope is wide | Technicians check panels, trim, sensors, brackets, and structural alignment, not just the visible dent. |
| Hidden damage is common | Sensors, wiring, and brackets behind panels can be damaged even when the outer surface looks minor. |
| PDR eligibility depends on location | Dent size matters less than location; edge and seam dents often require traditional bodywork. |
| Documentation protects you | Photographing your car before and after inspection prevents disputes over pre-existing damage. |
| Transparency signals quality | A trustworthy shop explains every line item in the report and walks you through the findings in person. |
What I've learned from watching car owners skip thorough inspections
Car owners often tell me they feel like a detailed inspection is a way for shops to pad the bill. I understand that instinct. A technician pointing out six damage points when you only saw one feels suspicious. But the opposite is actually the problem you should worry about.
A shop that misses hidden sensor damage or a bent bracket is not saving you money. It is setting you up for a repair that fails, a safety system that malfunctions, or a resale value that drops faster than it should. The inspection is not where shops make their money. It is where honest shops protect their reputation.
The most useful thing I tell car owners is this: bring your own photos. Walk the car with the technician. Ask what each finding means for your safety and your wallet. A good technician welcomes those questions. The shops that get defensive when you ask for explanations are the ones worth avoiding.
Choosing a shop that offers a free dent estimate with a written report is the single best filter for finding a trustworthy provider. It costs you nothing and tells you everything about how that shop operates.
— Martin
Dent-boys makes the inspection process straightforward
Dent-boys built its entire service around transparency, starting with the inspection. Every car owner gets a free estimate, a thorough damage assessment, and a clear explanation of what the findings mean for repair options and cost.
Dent-boys specializes in paintless dent repair and handles everything from single door dings to full hail damage assessments. The service includes pick-up and delivery, a rental vehicle during repairs, a $0 deductible, and a lifetime warranty on completed work. You get your car back in like-new condition without the guesswork of a traditional body shop. Schedule your free inspection with Dent-boys and know exactly what your vehicle needs before any work begins.
FAQ
What is included in a dent inspection?
A dent inspection covers the visible dent, adjacent panels, trim, structural alignment, hidden brackets, sensors, and wiring behind body panels. Technicians also photograph all damage with measurement references for the final report.
How long does a dent inspection take?
A thorough professional inspection typically takes 30–60 minutes, depending on the number of damage points and vehicle size. Complex cases with multiple dents or suspected structural damage take longer.
Can I prepare my car before a dent inspection?
Wash the car before the appointment, photograph every panel yourself, and write down any known damage. This preparation protects you from disputes and helps the technician work more accurately.
Does a dent inspection determine if PDR is possible?
Yes. The inspection measures dent size, depth, and location to determine whether paintless dent repair applies or whether traditional bodywork is needed. Dents near edges, seams, or structural lines often require more extensive repair.
Why do inspectors check areas beyond the visible dent?
Adjacent panels and hidden components frequently carry secondary damage from the same impact. Missing these areas leads to incomplete repairs, failed safety systems, and unexpected costs after the vehicle leaves the shop.